CupCakes

CupCakes
Vanilla and Chocolate Smartie Galore

Saturday 31 July 2010

Coconut and Chocolate Chip Cupcakes


6oz Butter
6oz Granulated Sugar
3 Eggs
6oz Self Raising Flour
1 Tsp Baking Powder
2 Tbp Coconut Milk
3oz Desnicated Coconut

Icing
18oz Icing Sugar
5oz Butter
2 1/2 Tbp Coconut Milk
3oz Desnicated Coconut
1 Tbp Coco Powder

Cooking Time: 180c for 12 minutes / or until risen.
Serving: 18 cupcakes

1.Cream together the butter and Sugar in a bowl
2. Whisk the eggs lightly in a separate bowl.
3. Whisk the eggs into the creamed mixture.
4. Sieve the flour and baking powder into the creamed mixture and stir slowly until well combined
5. Stir in the coconut milk and coconut until mixed thoroughly and evenly
6. Spoon into the cupcake cases in the baking tray and place in the preheated oven
7. Once done, leave in the tin for 5-10 minutes then place cupcakes on wire rack to cool

Icing
1. Beat the butter until smooth
2. Sieve in the icing sugar and add 1 Tbs of the Coconut milk and whisk with the butter
3. Add the rest of the coconut milk and desnicated coconut and whisk into the mixture for a few minutes until light and fluffy
4. Divide the mixture up, too half add the the coco powder
5. Decorate the cupcakes with the icing and if desired you can add decorations, but with the coconut in the icing these are yummy just as they are.

Thursday 29 July 2010

Lemon Cheesecake


8oz Biscuits
4oz Butter
Tin of light condensed Milk
8oz Light Cream Cheese
Juice and zest of 1 Lemon

Serving: 6
Dish Size: 8inch
Chilling time: 3 hours +

1. Crush the biscuits in the food processor or with a rolling pin
2. Melt the butter in a saucepan and mix with the crushed biscuit and press into a greased proof dish and put in the fridge to set
3. Cream the cream cheese in a bowl with a fork until smooth
4. Beat in the condensed milk into the cream cheese along with the lemon juice and zest
5. Smooth onto the biscuit base and put in the fridge to set or freezer if short of time

N.B. If you have more people over this recipe is perfect for doubling.

Light Lemon Cheesecake

8oz Biscuits (Crushed)
4oz Butter
4oz Icing Sugar
284Ml Double Cream (Light Elmlea double cream)0
14oz Cream Cheese (Light)
1 Lemon Juice and Zest

Serving: 6-8
Dish Size: 9inch
Chilling time: 2 hours

1. Crush the biscuits in a food processor or with a rolling pin
2. Melt the butter in a saucepan
3. Mix the crushed biscuit with the melted butter and press into the greased proof dish and put in the fridge to set, while waiting make the filling
4. Cream the cream cheese in a bowl with a fork until smooth
5. Sieve in the Icing sugar and beat with a wooden spoon until a smooth consistency
6. Add the Lemon Juice and zest and stir well
7. In a separate bowl whisk the cream until it holds peaks and stir into the cream cheese mixture
8. Put cheesecake mixture on top of the biscuit base and smooth out, making swirls with a knife for a nice design and sprinkle some lemon zest on top for a finish.

N.B. I use light cream and cream cheese to make this a healthier dessert
N.B. You can use Vanilla or orange if you prefer a different flavour

Wednesday 28 July 2010

Chocolate Chip Glace Heart


6oz Butter
6oz Granulated Sugar
3 eggs
8oz Self Raising Flour
1tsp Baking Powder
1tsp Vanilla Essence
12oz Chocolate chips


Oven Temp: Pre – heat Oven to 180c
Cooking time: Approx. 40-50 minutes in middle of oven
Tin Size: Heart Shaped (Standard)


1. Cream together the butter and sugar in a bowl
2. Whisk the eggs in a separate bowl
3. Gradually whisk the eggs into the creamed butter mixture until smooth
4. Add the vanilla essence and stir
5. Coat the chocolate chips in the flour and then sieve the flour and chocolate chips into the mixture
6. Stir the flour, baking powder and chocolate chips into the mixture slowly until it forms a smooth dropping like consistency
7. Pour into greased proof tin and bake
8. Once done leave in tin for 5-10 minutes to cool then put on wire rack
9. Once cool you can add Chocolate glace icing on the top and down the sides

Icing and Decoration

Glace Icing

14oz Icing Sugar
3 Tbs Coco powder
4 Tbs Warm Water

1. Sieve the Icing sugar and coco powder into a bowl
2. Add the warm water a Tbs at a time, beating the mixture with a fork each time to ensure it mixes well and forms a good consistency and smooth onto the cake with a wet knife.

N.B. I like the galce icing quite thick, as it gives the cake a good layer of icing, preventing it from getting dry and also makes it easier to stay onto the cake, so depending how much you like it, you may want to add more or less water.

Buttercream Decoration

2oz Butter
7oz Icing Sugar
1Tsp Milk
1 Tbs Coco Powder

1. Whisk the butter until smooth
2. Sieve in the icing sugar and whisk for a good few minutes
3. Add the milk and whisk until light and fluffy
4. Add the Coco powder
5. Using your piping set, pipe swirls around the side and top of the cake untill satisfied.

Marble Cake


6oz Butter
6oz Granulated Sugar
6oz Self Raising Flour
1Tsp Baking Powder
3 eggs
1 Tsp Vanilla Essense
2oz Coco powder


Oven Temp: Pre – heat Oven to 180c
Cooking time: Approx. 12-15 minutes in middle of oven
Tin Size: 2x7 inch

1. Cream together the butter and sugar in a bowl
2. Whisk the eggs in a separate bowl
3. Gradually whisk the eggs into the creamed butter mixture until smooth
4. Add the vanilla essence and stir
5. Sieve the flour and baking powder into the mixture and mix in slowly until it forms a smooth dropping like consistency
6. Put half of the mixture into the two greased baking tins
7. Sieve in the coco powder to the rest of the mixture and mix in thoroughly
8. Add this mixture between to the two baking tins and swirl the vanilla and chocolate mixture with a knife
9. Place into oven and bake
10. Once done leave in tin for 5-10 minutes to cool then put on wire rack
11. Once cool you can add the vanilla buttercream icing and filling.

Icing and filling
4.5oz Butter
12oz Icing Sugar
1tbs Milk
Vanilla Essence Flavouring
Chocolate Flake bar

1. Whisk the butter until smooth
2. Sieve in the icing sugar and whisk for a good few minutes
3. Add the milk and whisk until light and fluffy
4. Add the Vanilla Essence Flavouring
5. Layer icing onto each sponge cake
6. Layer cake up and decorate with the crushed by flake bar.

N.B. If your a chocoholic you can use chocolate Icing instead of Vanilla by adding Coco powder to the buttercream Or, you could be daring and do half vanilla and half chocolate.

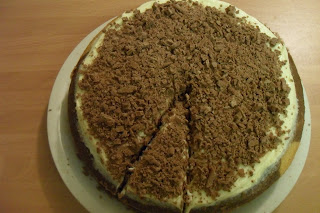
Cream Cheese Icing with Biscuit and Chocolate Crunch


10.5oz Icing Sugar
8oz Low Fat Cream Cheese
Flavouring (Juice and zest of one lemon / 1tsp Vanilla)
1 Flake Chocolate Bar
2 Biscuits


1. Firstly make a sponge using whatever you fancy, I reccommend the basic sponge but prehaps with a tint of Lemon!
2. Cream the cream cheese into a bowl until smooth.
3. Stir in the Icing Sugar and then whisk until the mixture forms a smooth consistency
4. Add the flavouring and stir well
5. Layer the Icing onto the sponge, making swirls with a knife
6. Crush up the biscuits and chocolate and sprinkle onto the cake.


N.B. Be careful not too overwhisk otherwise the icing will become runny.

N.B. This cake will keep a few days, but less than normal buttercream as it is creamcheese.

Tuesday 27 July 2010

Coconut Milk Cake


6oz Butter
6oz Granulated Sugar
6oz Self Raising Flour

1Tsp Baking Powder
3 Eggs
2 Tbs Coconut Milk
3oz Desiccated Coconut

Oven Temp: Pre – heat Oven to 180c
Cooking time: Approx. 40-50 minutes in middle of oven
Tin Size: 2 x 7 inch

1. Cream together the butter and sugar in a bowl
2. Whisk the eggs in a separate bowl
3. Gradually whisk the eggs into the creamed butter mixture until smooth
4. Sieve in the flour, baking powder and stir slowly but thoroughly
5. Coat the cherries in the flour and then sieve the flour
6. Add the coconut milk and coconut and mix well
7. Pour into greased proof tin and bake in the middle of the oven
8. Once done leave in tin for 5-10 minutes to cool then put on wire rack

Icing and Filling

12oz Icing Sugar
5oz Butter
3 Tbs Coconut Milk
3oz Desiccated Coconut

1. Cream the butter
2. Whisk in the icing sugar
3. Add the Coconut Milk and Coconut and whisk into the creamed mixture thoroughly
4. Divide the Icing in half and put half on each sponge.
5. On one sponge add strawberry jam and smooth out
6. Layer the other sponge on top of the jam and decorate if so desired or just tuck in and eat

N.B. Depending how thick you like the buttercream icing you can add more milk to make it less thick and more of a glace form of icing
N.B. If your not a major fan of Coconut, you can leave the desiccated coconut out of the icing and use just the milk, but I love the different texture the coconut gives to the icing.


Monday 26 July 2010

Birthday Decorations


Filling

2oz Butter
6oz Icing Sugar
½ Tbp milk
1 Tsp Flavouring

1. Whisk the butter until smooth
2. Sieve in the icing sugar and whisk for a good few minutes
3. Add the milk and whisk until light and fluffy
4. Add the Flavouring and whisk
5. Cover one sponge with the buttercream and then top with the jam and spread evenly
6. Place other sponge on top of buttercream

Decoration

Batch of Buttercream icing, any flavour
Chocolate and Vanilla Wafer Biscuits
Chocolate buttons
Chocolate Flake

Make a batch of the icing, you could use any flavour depending on what you fancy and what flavour the cake is e.g. Lemon, Mocha, Chocolate, Coconut.

1. Cover the whole cake with the icing, spreading evenly with a knife
2. Break the Vanilla wafer and half of the Chocolate Wafer biscuits into crumbs
3. Break the rest of the chocolate wafer biscuits into triangle shapes and place around the edge of the cake
4. Break the flake up into small pieces and along with the broken up wafer biscuit sprinkle over the cake
5. Using the Chocolate buttons, make whatever pattern you desired as you can see I did a 21!

Sponge Mixture


This is the most Basic Recipe you need to master and then your baking world will be opened up to you, so tuck on and read and have a go.

6oz Butter
6oz Granulated / Caster Sugar
6oz Self Raising Flour
1Tsp Baking Powder
3 eggs
1 Tsp Vanilla Essence

Tin Size: 2 x 7inch tin or 15 cupcakes
Oven Temp: Gas Mark 5 / 190c / 375 F
Cooking Time: 12-15 minutes

1. Cream together the butter and sugar in a bowl
2. Whisk the eggs in a separate bowl
3. Gradually whisk the eggs into the creamed butter mixture until smooth
4. Add the vanilla essence and stir
5. Sieve in the flour and baking powder and stir until the mixture forms a smooth dropping like consistency
6. Pour into greased proof tin and bake
7. Once done leave in tin for 5-10 minutes to cool then put on wire rack

Vanilla and Chocolate Smartie Galore


6oz Butter
6oz Granulated Sugar
6oz Self Raising Flour

1 Tsp Baking Powder
1 Tsp Vanilla Essence
2 Tbs Coco Powder
3 Eggs


Serving: 15
Oven Temp: Gas Mark 5 / 190c / 375 F
Cooking Time: 12-15 minutes

1. Fill the cupcake tin with the cupcake cases
2. Cream together the butter and sugar in a bowl
3. Whisk the eggs in a separate bowl
4. Gradually whisk the eggs into the creamed butter mixture until smooth
5. Sieve the flour and baking powder into the mixture slowly until it forms a smooth dropping like consistency
6. Divide the mixture into two, adding the Vanilla Essence to half the mixture and the Coco Powder to the other stirring well.
7. Divide the mixture evenly between the cupcake cases and put into the middle of the oven for 12-15 minutes
8. Once done leave in tin for 5-10 minutes to cool then put on wire rack

Icing and Decoration
Decorating these cupcakes is the key to their success! You need to have a good piping set either metal or bag is fine and a nozzle that is medium size and is a swirl shape. 1 or 2 smarties on top finish the cupcake off excellently and look sophisticated, making them great for any occasion.

4.5oz Butter
12oz Icing Sugar
1tbs Milk
1 Tsp Vanilla Essence / 2Tbs Chocolate Powder


1. Whisk the butter until smooth
2. Sieve in the icing sugar and whisk for a good few minutes
3. Add the milk and whisk until light and fluffy
4. Divide the mixture into two and add the Vanilla Flavouring to one half and the Chocolate to the other.
5. Pipe the icing onto the cupcakes using a swirl nozzle to create even swirls on top of the cake twirling as you reach the middle
6. Place a Smartie on top of each cake

Sunday 25 July 2010

Chocolate Chip Chewy Cookies


3.5oz Oats
4.5oz Plain Flour
3.5oz Butter
3.5oz Dark Brown Sugar
3.5oz Castor Sugar
1 Large Egg
½ tsp Vanilla Essence
4oz Chocolate Chips

Serving: 15 small / 8 big
Oven Temp: Gas Mark 5 / 190c / 375 F
Cooking Time: 10-15 minutes

1. Mix together the flour and oats in a bowl
2. Cream the butter and both sugars in a separate bowl
3. Whisk in the egg and vanilla essence into the buttered mixture
4. Add the chocolate chips and the flour and oats into the creamed mixture and stir well
5. Roll into even sized balls and place approx. 5cm apart on the baking tray
6. Place in the oven and bake, checking at 10 minutes to ensure it does not burn
7. Remove from the oven and leave to cool slightly before removing from the baking tray onto a cooling rack

N.B. If you prefer your cookies more Crispy then leave in the oven longer
N.B. If you prefer you can replace the chocolate chips with cheeries, dried fruit or white chocolate chips

Cheery and Coconut Biscuit Squares


Tin of Condensed Milk (Light)
12oz Digestive Biscuits
50 Small Marshmallows
20 Glace Cherries (Chopped in half)
Desiccated Coconut


Serving: 15
Chilling time: 3 hours+

1. Crush the biscuits in a food processor or in a bag with a rolling pin
2. Mix the crushed biscuits, marshmallows and Cherries in a bowl
3. Add the tin of condensed milk and stir until all the mixture is combined and forms a sticky dough (If the dough is too dry, add a drop of milk)
4. Cover greaseproof paper with a good amount of desiccated coconut
5. Dollop the mixture onto the coconut and using your hands form into a log
6. Once it is shaped, sprinkle another layer of coconut by the side of the dough and roll the dough over, ensuring all the dough is covered with coconut
7. Once done, place on tray / plate for support into the fridge and leave to set for 2+ hours
8. When ready, remove and cut into slices and serve

N.B. As you can see we sliced the log into slices and then placed them on top of one another to make a birthday cake, just adds to the presentation and makes it that all a bit more fancy!

Home Made Granola

20oz Oats
6oz Butter
4oz Light Brown Sugar
1 tsp Cinnamon

Cooking Time: 10-15minutes

1. Melt butter and sugar in saucepan over a low heat
2. Keeping heat low, add oats to melted mixture
3. Stir until some of the mixture forms chewy clusters and others is crispy
4. Turn off heat and put mixture aside ready to eat hot or cold

N.B. If you like your granola more crispy and crunchy keep stirring on a low heat for longer.