CupCakes

CupCakes
Vanilla and Chocolate Smartie Galore
Showing posts with label Icing. Show all posts

Saturday, 30 April 2011

Ginger Cake


6oz Butter

6oz Caster Sugar

3 Eggs

7oz Self Raising Flour

1Tsp Groun Ginger

1Tsp Bi carbonate of soda

1Tsp Baking Powder

3oz Preserved Ginger (Chopped)

2Tbsp Ginger Syrup


Cooking time: Pre heat oven to Gas Mark 4/180c and bake for 1 hour

Serving: 8" Sping bottom cake tin


1. Cream together the butter and sugar in a bowl with a whisk for a few minutes until smooth. Use a wooden spoon to scrape around the edge to ensure it is all mixed in well

2. In a separate bowl whisk the eggs together for a few minutes until it has doubled in volumte

3. Whisk the egg mixture slowly into the creamed butter mixture until it is combined and forms a nice consistincy

4. Weigh out the flour, bicarbonate of soda, baking powder and ground ginger and sieve into a bowl

5. Add the chopped ginger to the flour mixture and stir in, so that it is coated in flour

6. Add the dry ingredients to the wet ingredient mixture and stir in well, using a figure of eight is best, be careful not to over mix

7. Once the mixture if stirred in, add the ginger syrup and stir in well to the mixture is all mixed in together and you have a nice smooth dropping consistency

8. Grease the cake tin and pour the mixture into the tin and smooth out with a knife

9. Put in the oven and bake (Half way through baking, cover the cake with greaseproof paper to prevent the top of the cake from burning)

10. Once the cake is done, remove from the oven

11. Leave to cool in the tin for a few minutes (10) before removing it from the tin and transferring it to a wire cooling rack to cool


Ginger Icing

8oz Icing Sugar

2oz Butter

2Tbsp Ginger syrup


1. In a bowl cream the butter into soft

2. Sieve in the icing sugar a bit at a time and mix in with a fork and then a whisk

3. Once you have added all over the icing sugar, whisk the mixture together for a couple of minutes, this makes the icing nice and fluffy and light

4. When nearly done, add the ginger syrup and whisk for a further few minutes

5. Once the cake is cool, dollop the icing on top of the cake and smooth over

6. Decorate with ginger slices and glace cherries

7. Tuck in with a nice cuppa!

Wednesday, 30 March 2011

Chocolate Hedgehog Cake


6oz Butter

6oz Caster Sugar

8oz Self Raising Flour

3 Eggs

4oz / 100g Dark Chocolate

2oz Cocoa Powder

4oz Chocolate chips

1 Tsp Baking Powder

1 Tsp Bi Carbonate of Soda

2 Tbsp Milk


Cooking time: 45 minutes on a pre heated oven of 180c. Half way through cooking you need to cover the sponge with greaseprrof paper

Serving: 8" square spring tin


1. Pre heat the oven and grease proof the cooking tin

2. Place a heatproof bowl over a pan of simmering water and break the chocolate into the bowl and slowly melt on a low heat, stirring occasionally to prevent it from burning

3. In a bowl cream together the butter and sugar, do this until the mixture if fully combined

4. In a separate bowl whisk the eggs together for a few minutes

5. Slowly whisk the egg mixture into the creamed mixture, using a wooden spoon to scrape around the edges to ensure the mixture is fully combined together

6. Sieve in the flour, baking powder and bi carbonate of soda. Fold this in slowly

7. Once this nearly done, add the melted chocolate, chocolate drops and milk and fold in slowly but firmly so the mixture forms a good chocolately consistency and it is all combined

8. Pour the mixture into the tin and smooth out

9. Put into the oven, about 20 minutes through the baking time, place some greaseproof paper over it and continue to bake.

10. Once done, remove from the oven and remove the sides of the tin, leave to cool before moving the bottom and transferring to a wire cooling rack


Buttercream Icing

1 quantity of the 'perfect buttercream icing' from this website

3oz Cocoa Powder and 1 Tbsp milk

2 Ripple Chocolate Bars

3 Flake Chocolate Bars

Glace Cherries


1. Make the icing as described on this wesbite, but adding 3oz Cocoa powder and 1 Tbsp milk to the mixture.

2. To prepare the cake, cut the cake vertically in half and using a little of the icing, put some on one side of the cake and then stand both of the cakes up on to the flat sides and stick together

3. You will now have a narrow but tall cake

4. At the front you need to cut a slight diagonal shape for the face, slicing a bit of the cake from both sides, to form a point at the end

5. Now cover the whole cake in icing!!!

6. Cut the flake and ripple bars up into strips of chocolate, and then stick them into the icing

7. I put chocolate flake on top of the hedgehog and ripple bars down the sides

8. For the nose, I used a bit of the sponge that was cut from the side and cut it into a square shape

9. For the eyes, cut a cherry in half and place them at the front but more towards the side

10. There you have it one, very chocolately hedgehog cake!!


N.B. This cake went in one sitting as it is so yum!

Sunday, 13 March 2011

80th Birthday Cake


6oz Butter
6oz Caster Sugar
8oz Self Raising Flour
1 Tsp Baking Powder
1 Tsp Bi Carbonate of Soda
3 Eggs
12oz Glace Cherries (Halved)
2 Tsp Vanilla Essence
1 Tbsp Milk


Cooking Time: 35 minutes on a pre heated oven of 150c / Gas mark 3. Make sure half way through you cover the cake with greaseproof paper

Serving: 8" deep Spring round cake tin

1. Pre heat the oven and grease proof the baking tin
2.Cream together the butter and sugar with the whisk for a few minutes
3. In a separate bowl whisk together the vanilla essence and eggs together for a few minutes
4. Slowly whisk the eggs into the creamed mixture a bit at a time until the mixture becomes soft and fluffy in consistency and has increased in volume
5. Use a wooden spoon to scrape around the edges to ensure all the mixture is mixed in
6. Into a separate bowl sieve the baking powder, bi carbonate of soda and flour
7. Chop the cherries in half and put into the bowl with the flour and coat the cherries in the flour
8. Fold the flour mixture slowly into the creamed butter mixture a bit at a time with the milk, do this until all the mixture if mixed in thoroughly and forms a good consistency
9. Pour the mixture into the tin and put into the oven to bake
10. Half way through the baking, cover the cake with greaseproof paper
11. Remove the cake from the oven and leave in the tin for a few minutes before transferring the cake to a wire cooling rack to cool
12. While it is cooling you can make the buttercream icing

Buttercream Icing
3oz Butter
8oz Icing Sugar
1 Tsp Vanilla Essence
1/2 Tbsp milk
1. Cream the butter in a bowl with a whisk until soft
2. Sieve the icing sugar into the bowl a bit at a time
3. Use a fork and then a whisk to whisk the icing sugar in with the butter
4. Add the vanilla essence and milk to the icing and mix in well but not too much that it becomes runny
5. When the cake is cool, cut the cake horizontally in half and spread the buttercream on to one of the sponges
6. Then place one sponge on top of the other with the buttercream icing in the middle and place on to a plate or board

Decoration
1 packet of Fondanct Icing
1 quantity of Buttercream icing as above divided in two
Yellow and red food colouring
Ribbon
Silver ball balls
Strawberry jam

1. Cover the top and side of the cake with a smooth thin layer of jam, this helps the icing to stick to the cake
2.Roll out the fondant icing onto a level surface sprinkled with a bit of icing sugar so it does not stick to the surface
3. Once the icing is rolled out, using a rolling pin, cover the rolled icing onto the rolling pin (this makes it easier to then cover the cake)
4. Put the edge of the rolled icing onto one side of the cake and using the rolling pin flip the icing over the cake
5. Once it is over the cake, gently press the icing around the cake
6. Using a sharp knife cut off any excess icing and press the icing in firmly around the bottom of the cake
7. With the buttercream, divided into 2 bowls, add a few drops of yellow food colouring to one and red to the other
8. Using a fork mix the food colouring into the buttercream until it has coloured the icing and is one colour throughout
9. Fill a piping tube / bag with the yellor food colouring and a medium size twirl nozzle
10. On too the cake pipe swirls around the edge of the cake and near the bottom of the cake pipe 4 swirls and then 1 underneath. Do these swirls slightly bigger and place a silver ball ball in the middle of them
11. With the red food colouring, put in the pipping bag / tube with a small swirl knozzle at the bottom and write 80th on to the cake
12. I used red food colouring to match the red ribbon I used and I chose yellow as it is a colour of spring.
13. Then when the cake is done, you can tuck in!
14. You can eat these on the day or make in advance by up to 2 days

Thursday, 17 February 2011

Red Velvet Valentines Cake


6oz Self Raising Flour

6oz Caster Sugar

6oz Butter

3 Eggs

1 Tsp Baking Powder

1 Tsp Bi Carbonate of Soda

2oz Cocoa Powder

3/4 Bottle of Red Food Colouring

2 Tbsp milk


Cooking time: 180c / Gas Mark 5 on preheated oven for 15 minutes

Serving: 2 x 7" tins / double layer cake


1. Pre-heat the oven and greaseproof to the two baking tins

2. Cream together the butter and sugar until smooth

3. In a separate bowl whisk the eggs together until they are combined

4. Whisk the eggs into the creamed mixture until the mixtures are well combined and it has formed a nice smooth fluffy consistency

5. Sieve the flour, baking powder, bi carbonate of soda and cocoa powder in to the mixture, fold this flour mixture into the creamed mixture slowly but firmly so that it becomes combined and a smooth consistency

6. Add the milk and red food colouring and fold in, till the mixture has formed a nice red consistency

7. Divide the mixture evenly between the two tins and bake in the oven for 15 minute

8. Once the cake is done leave in the tin to cool for 5 minutes before transferring to a wire cooling rack


Cream Cheese Icing

3oz Butter

3oz Cream Cheese

14oz Icing Sugar

2 Tsp Vanilla essence

Tbsp Jam

Chocolate Flake Bar


1. Cream the butter and cream cheese in a bowl until smooth

2. Sieve in the icing sugar into the buttered mixture a bit at a time mixing the mixture together

3. Add the vanilla essence and then whisk the mixture together for a few minutes until it is a soft smooth fluffy consistency

4. Divide the mixture between the two layers of sponge, putting jam on one layer and the chocolate bar on the other and then eat!

Wednesday, 9 February 2011

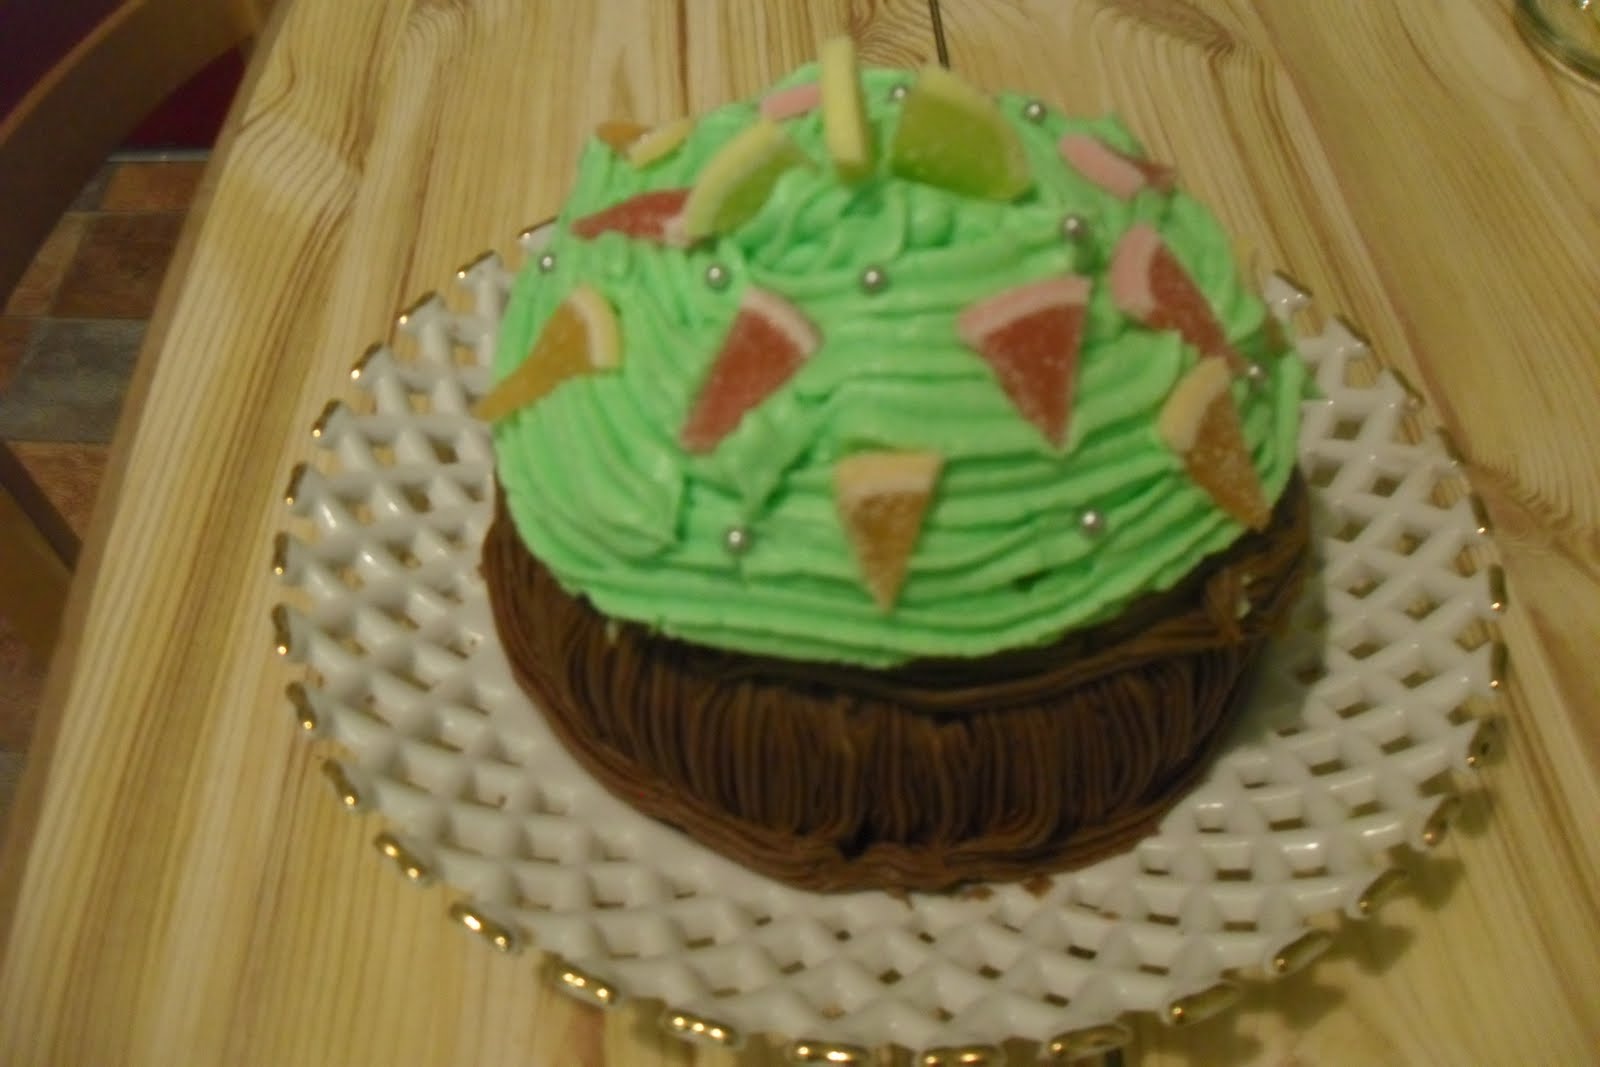
Giant Flower Cupcake


Sponge Recipe from the Large cupcake Christmas Tree
A batch of Chocolate buttercream icing from the christmas tree recipe
A batch of Vanilla buttercream icing from the christmas tree recipe but omitting the green food colouring.
Glace Cherries (chopped)


1. Make the cake mixture as described for the large christmas tree.
2. You can add cherries, chocolate drops or leave the mixture plain.
3. When the cake is baked leave it too cool before decorating.
4. Make up the batches of buttercream icing as decribed in the christmas tree cupcake recipe.
5. Decorate the bottom of the cupcake first with the chocolate buttercream
6. Use a thin piping knozzle to pipe verticle lines up and down to form the cupcake casing for the cake.
7. Please the top sponge layer on top of the bottom.
8. For the top of the cake, fill a large piping bag with the vanilla buttercream and a twirl (large) knozzle onto the piping bag.
9. Squirt a dob of buttercream icing all over the top of the cake making a good decorative flower design.
10. Chop the cherries in half and place over the cupcake
11. Tuck in and enjoy!

N.B. you can also use smarties, chocolate drops or silver ball balls to decorate the top of the cupcakes

Thursday, 3 February 2011

Chocolate Mint Orange Cake


6oz Self Raising Flour
6oz Caster Sugar
6oz Butter
3 Eggs
3oz Cocoa Powder
1Tbsp Milk
1Tsp Baking Powder


Cooking time: In a pre heated oven 180c/ Gas Mark 5 for 15 minutes
Serving: A double layer sponge / 2 x 7" Victoria sponge cake tins

1. Cream the butter until soft
2. Cream the butter and sugar together into smooth and creamy
3. Whisk the eggs together in a separate bowl for a few minutes
4. Whisk the eggs slowly into the butter cream mixture until the mixture is well combined
5. Slowly sieve in the cocoa powder, baking powder and flour and fold slowly into the butter mixture
6.Mix all the ingredients not whisk until the mixture is a smooth consistency
7. Divide the mixture evenly between the two greased tins and level out so it is even
8. Put in the oven and bake for 15 minutes or until golden
9. Remove from the oven and leave in the tins for a few minutes until cool and then empty on a wire cooling rack to cool before icing

Icing and Decoration
14oz Icing Sugar
5oz Butter
2oz Cocoa Powder
4oz Chocolate Bar
1. Break the chocolate bar up and put into a heat proof bowl over a pan of hot boiling water or in the microwave to melt
2. Put the butter into a bowl and cream until smooth
3. Sieve in the cocoa powder and icing sugar and whisk into the butter mixture
4. When the chocolate has melted pour into the bowl and whisk together until the icing comes together and forms a nice smooth spreading consistency
5. Place 1/3 of the icing on one of the sponges and then place the other sponge on top of the sponge
6. Spread the rest of the icing on top of the cake and around the edges and spread until smooth
7. Cut the orange matchmakers to the correct height of the sponge and decorate around the edges of the cake
8. Put the manadrins on top of the cake and decorate with any desired fruit.
9. The juices from the fruit make the sponge nice and moist
10. Then tick in and enjoy!

Monday, 27 December 2010

Christmas Tree CupCake


6oz Self Raising Flour
6oz Butter
6oz Caster Sugar
3 Eggs
1 Tsp Vanilla Essence
100g Chocolate drops
1 Tsp Baking Powder
1 Tsp Bi Carbonate of Soda

Cooking time: 30-45 minutes on 170c / Gas Mark 4
Serving: 1 Large cupcake

1. Pre-pare your cupcake tin by greasing it well with butter and putting it on a baking tray
2.Cream together the butter and into a bowl until it is smooth
3. Whisk the eggs and vanilla together in a separate bowl
4. Whisk the eggs into the creamed butter mixture for approx. 2-3 minutes until the mixture is smooth and fluffy
5. Into a separate bowl sieve the flour, baking powder and bi carbonate of soda
6. Add the chocolate chips to the flour mixture and coat well
7. Add the flour mixture to the butter mixture and fold in gently but smoothly ensuring it is all mixed in well
8. Once mixed together divide the mixture evenly between the top and bottom of the cupcake
9. In the bottom part of the cupcake insert the insert if you have one as shown by the instructions (this means you then have a hole which you can fill with extra filling, yum!)
10. Put in the Oven and bake, at about 20 minutes through cover the sponge with baking proof paper so it does not burn on top but cooks through
11. The bottom part of the cupcake will take longer to bake than the top
12. Once each part is done, remove from the oven and leave to cool for a few minutes before removing from the silicone case onto a wire cooling rack

Decoration and Icing
12oz Icing Sugar x 2
4oz Butter x2
1 Tsp Vanilla Essence
2 Tbp Cocoa Powder
Orange and lemon slices
Silver ball balls

1. Prepare the two batches of icing as follows;
2. Cream the butter in a bowl until soft
3. Sieve the icing sugar into the butter and mix with a metal fork until it is combined
4. Mix witha fork or a whisk for a few minutes until it forms a smooth consistency but not runny! Otherwise it will not hold its shape when piped
5. In one batch add the vanilla and mix to the other sieve in the cocoa powder and mix well
6. I decorated the top of the cupcake first using a swirl piping knozzle and piping bag and piped around the cupcake
7. I then added slices of organge and lemon to be the christmas lights and then little silver ball balls for the tinsel effect
8. I then decorated the bottom before putting the top on top. I did this using a piping tube and a small knozzle to make the lines more defined like bark. I did this by starting at the bottom of the cake and piping up and just over the edge to get a smooth finish.
9. I then put about a good cm of buttercream in the middle to hold the top and bottom together
10. Carefully lift the top of the cupcake onto the top of the bottom and press gently down
11. Then do any last bits of icing in the middle to make it form nicely together and there you have it a green cupcake or what I like to say a Christmass Tree!

Thursday, 16 December 2010

White Christmas Chocolate Cake with Chocolate Buttercream


6oz Self Raising Flour
6oz Caster Sugar
6oz Butter
3 Eggs
1 Tsp Baking Powder
1 Tsp Bi carbonate of Soda
150g White Chocolate (Melted)
Cooking Time: 15 minutes on 180c/ Gas Mark 5
Serving: 1 2 tier Sponge Cake

1. Grease two victoria sponge tins (7") with butter and a touch of flour
2. Chop the chocolate and place in a bowl over hot water to melt, stirring occasionally to ensure it does not burn
3.Cream together in a bowl the butter and the sugar
4. In a separate bowl whisk the eggs together
5. Whisk the eggs into the butter mixture until it is well combined approx. 2-3 minutes
6. Sieve the flour, baking powder and bi carbonate of soda into the creamed mixture and fold in gently till it forms a nice smooth consistency
7. Once all the chocolate is melted add to the cake mixture and fold in
8. Divide the mixture evenly between the two cake tins and bake
9. Once done, remove from the oven and leave to cool for a few minutes before transferring to a wire cooling rack
Buttercream Icing and Decoration
16oz Icing Sugar
51/2oz Butter
1 Tbs Milk
1/2 Tsp Vanilla Essence
2 Tbs Cocoa Powder

1. Prepare the buttercream but creaming the butter in a bowl
2. Sieve in the icing sugar and add the milk and whisk together with a whisk or fork to form a good smooth strong consistency to use for piping
3. Remove about 1/5 of the mixture and put to one side, to this add the vanilla essence
4. To the rest sieve in the cocoa powder and mix in well
5. Divide the chocolate buttercream between the two sponge and spread out evenly with a damp knife
6. Place one sponge on top of the other
7. Fill a piping bag and I used a Swirl knozzle and pipe a design around the cake! I did a christmas one as it was for a christmas party and then enjoy!

Thursday, 9 December 2010

Blackberry Swirl Cupcakes with Blackberry Cream Cheese Butter Icing


4oz Butter
4oz Caster Sugar
4oz Self Raising Flour
1 Tsp Baking Powder
1 Tsp Bi Carbonate of Soda
2 Eggs
1 Tsp Vanilla Essence
2 Tbs Blackberry Jam / Conserve
1 Tbs Milk

Cooking Time: 180c / gas mark 5 for 15 minutes
Serving: 12 Cupcakes

1. Cream together the butter and Sugar with a whisk until creamy
2. In a separate bowl whisk the eggs and vanilla essence together
3. Slowly whisk the eggs into the butter mixture until combined
4. Sieve the flour, baking powder and Bi Carb into the butter mixture
5. Fold in gently until it is well combined
6. Add the Jam and milk and fold in until you have a swirl mixture of Jam running through
7. Divide the mixture evenly between the cupcakes cases and bake for approx. 15 minutes.
8. Once done, remove from the oven and leave for 10 minutes before transferring to a wire cooling rack.

Blackberry Cream Cheese Butter Icing
2oz Cream Cheese (Low Fat Tesco own is what I used)
2oz Butter
12oz Icing Sugar
2 Tbs of Blackberry Jam / Conserve

1. Cream together the cream cheese and butter in a bowl until smooth (You can use a metal spoon for this)
2. Sieve the icing sugar into the creamed cheese mixture
3. Mix the mixture together well using a metal fork until it is combined (Do not over mix otherwise it will become runny)
4. Add the blackberry Jam and mix into the mixture until all combined
5. Put a good size teaspoon or more on each cake and smooth out with a knife
6. If you wish and have some around you could then top each with a blackberry!

N.B. You can add any flavour of Jam you wish
N.B. If you have a sweet tooth, add more Jam, but I found this plenty
N.B. Because they contain cream cheese its best to eat these cupcakes fresh

Saturday, 27 November 2010

Cherry Bakewell Cupcakes


4oz Butter
4oz Caster / Granulated Sugar
4oz Self Raising Flour
1 Tsp Baking Powder
1 Tsp Almond Extract
2 Eggs
2oz Ground Almonds
3oz Glace Cherries (Chopped)


Cooking time: 170c Fan / Gas mark 5 for 15 minutes in preheated oven

Serving: 12 Cupcakes

1. Preheat the oven and put cupcake cases in the cupcake tin

2. Chop the cherries and put to one side

3. Cream together the butter and sugar with a whisk for 2 minutes, until well combined, use a wooden spoon to scrape around the edge of the bowl and mix together

4. In a separate bowl whisk the eggs and almond extract together for a couple of minutes

5. Slowly pour the egg mixture into the butter mixture and whisk together for a good few minutes until well combined and it provides a good consistency

6. In to a separate bowl sieve the flour and baking powder

7. Add the chopped cherries and ground almonds to this mixture and stir

8. Mix flour mixture into the egg mixture and fold in slowly but until well combined

9. Divide the mixture evenly between the cupcake cases and put in the oven

10. Bake for 15 minutes or until golden, once done remove and leave in the tin for 5-10 minutes before transferring to a wire cooling rack

Icing

1 Tbs Custard Powder

200ml Milk

2oz Butter

9oz Icing Sugar

6 Cherries (Halved)

1 Tsp Almond Extract

1. Put the custard powder into a jub and a little milk to make a smooth paste
2. Put the remaining milk in a saucepan and bring to the boil slowly
3. Pour the hot milk onto the custard and stir until combined
4. Return the mixture to the pan and heat gently for 1-2 minutes untill it thickens
5. Remove from the heat and cover with some damp greaseproof paper to prevent a skin forming and let it cool (you can put it in the fridge to speed this process up)

6. Once cooled put the custard into a bowl and whisk in the butter and almond extract and chill for a further 20-30 minutes

7. Gradually whisk in the icing sugar into the chilled mixture until it is smooth, but thick

8. Using a knife spread onto the cupcakes

9. Cut the cherries in half and place a half on each of the cupcake

10. Tuck in and enjoy

Sunday, 21 November 2010

Car Shaped Birthday Surprise


8oz Butter
8oz Granulated Sugar
10oz Self Raising Flour
1.5Tsp Baking Powder
4 Eggs
2Tsp Vanilla Essence
6oz Cherries (Chopped)
1-2Tbs Milk

Cooking time: Gas mark 4/170c for 45 minutes
Serving: 15cm by 30cm cake tin

1. Cream together the butter and sugar in a bowl with a whisk for 2-3 minutes
2. In a separate bowl whisk together the eggs and vanilla essence for 2 minutes
3. Whisk the egg mixture into the butter mixture for a further 2-3 minutes until the mixture is well combined and a smooth consistency
4. In a separate bowl sieve the flour and baking powder togeth
5. Mix the chopped cherries into the flour mixture
6. Fold the cherry mixture into the egg mixture and mix well until it is well combined and a nice smooth dropping consistency
7. Add the milk and mix well
8. Pour the mixture into the grease proof paper tin and spread out with a knife so it is even
9. Pop in the oven to bake, half way through the baking time, open the door and check the cake and cover with greaseproof paper this prevents the cake from burning and from it being cooked through
10. Once done leave in the tin to cool for a while and then using the greaseproof paper to help you turn out onto a chopping board to cool

Making the Shape
1. Turn the cake so its the right way up
2. At each corner cut a triangle off, so you should be left with a roundish point at each end
3. You then will have 4 triangle pieces, 2 of these will be spare and on the other 2 you need to curve the top so it is not pointie and a nice curved shaped
4. You then place these at one end of the rest of the cake e.g. the right hand side with the longer edge at the front of the car and the taller side in the middle (This will be the front of the cake)
5. You then need to cut along the sides to make it narrow, these will be fairly easy as it will be from where the triangle pieces were cut
6. With these two pieces, do the same and curve the top and place at the other end e.g. left. Again the longer, sloping side at the front and the taller in the middle. (This will be the back of the cake)
Icing and Decoration
2 Batches of the 'perfect icing' from this blog
4 Jammy Dodgers
Sweet shoe laces / strawberry laces
3 Cherries
Jam
Silver Ball Balls

1. Cover the whole cake with the icing, Use the icing to help you hold the sponges inplace, I also used Jam as well as it adds more flavour and is a nice surprise for when the person takes a bite
2. Do not leave to set as you need to put the other decorations on
3. Cover the back of the jammy dodges with jam and press onto the side of the cake
4. Cut the cherries in half and use 2 halves at each end of the lights and one half for the stirring wheel
5. Cut the shoe laces and place them on the car as shown in the picture or how you desired
6. I then made the number 17 as it was my brothers 17th Birthday, but you can do what ever you desire
7. Tuck in and enjoy as much as you want! This cake went in one go!!

Monday, 15 November 2010

White Chocolate Chip Chocolate Cupcakes


4oz Butter
4oz Sugar (Granulated / Caster)
4oz Self Raising Flour
2 Eggs
1Tsp Baking Powder
100g Packet of White Chocolate Chips
2oz Cocoa Powder
1-2Tbp Milk


Cooking Time: Gas Mark 4 / 180c for 15 minutes
Serving: 12 Cupcakes

1. Pre heat the oven and line the cupcake tin
2.Cream together the butter and sugar with a whisk until smooth
3. Whisk the eggs together in a separate bowl for 1-2 minutes
4. Whisk the eggs into the butter mixture for a good 2-3 minutes until the mixture if smooth, use a wooden spoon toe scarpe round the edges
5. Measure out the flour,cocoa powder and the baking powder and sieve them into a separate bowl
6. Pour the white chocolate chips into the flour mixture and mix with a spoon coating the chocolate chips with the mixture
7. Add the flour and chocolate chip mixture to the egg mixture and fold in gently and smoothly, until it is all mixed through and the mixture is a even chocolate mixture
8. Add 1-2 Tbs of Milk to the mixture to lighten it, as cocoa can tend to make it heavy and mix well
9. Divide the mixture evenly between the cupcake cases and pop in the oven until golden and risen or for 15 minutes
10. Remove from the oven and leave in the tin to cool for 5-10 minutes before transferring to a wire cooling rack

Buttercream Icing
3.5oz Butter
12oz Icing Sugar
2oz Cocoa Powder
1Tsp Vanilla Essence

1. Cream the butter in a bowl
2. Sieve in the icing sugar and whisk with the butter for a good couple of minutes on a high speed until well combined
3. Divide the mixture into two bowls
4. To one half add the vanilla essence and whisk for a furth 1-2 minutes
5. To the other half add the cocoa powder and do the same
6. With a piping bag or tube, put a tsp of vanilla icing in followed by tsp of chocolate, alternating the flavours until it if full
7. Then pipe away and the icing will come out as a nice 2 zone!

Tuesday, 2 November 2010

Coconut Milk Cupcakes with Coconut Glace Icing

4oz Self Raising Flour
4.5oz Caster Sugar
1.5oz Butter
1Tsp Baking Powder
1 Egg
120ml Coconut Milk
3oz Desiccated Coconut

Cooking time: Gas Mark 4 / 180c for 15 Minutes
Serving: 12 Cupcakes


1. Pre heat the oven and prepare the cupcake tin
2.Cream together the butter and sugar in a bowl
3. Sieve the baking powder and flour into the butter mixture and mix until it forms breadcrumbs, you can do this using your hands or whisk for a few minutes
4. In a separate bowl mix the coconut milk and vanilla together and beat into the flour mixture using the whisk
5. Add the egg and desiccated coconut and beat well until the mixture forms a nice dropping consistency
6. Divide the mixture between the cupcake cases and put in the oven for 15 minutes or until golden
7. Remove from the oven when done and leave in the tin for 5-10 minutes before transferring to a wire cooling rack to cool

Coconut Glace Icing
10oz Icing Sugar
100Ml Coconut Milk
2oz Desiccated Coconut

1.Sieve the icing sugar into a bowl
2. Add the coconut milk and mix with a fork into the icing sugar
3. You want the icing to be thick but a dropping consistency so it makes it easier to spread, but not too runny that it runs off the cupcakes
4. Put a good Tsp of icing on each cupcake and smooth over with a knife
5. Sprinkle desiccated coconut on top and tuck in!

N.B. The cake mixture can appear runny but do not worry it will bake lovely.
N.B. You can use buttercream icing if you wish (See this blog for the website and instead of adding milk you use the coconut milk and whisk for a good few minutes)

Sunday, 31 October 2010

White Amaretto and Cherry Cupcakes


4oz Caster Sugar
4oz Butter
4oz Self Raising Flour
1Tsp Baking Powder
2 Eggs
1Tsp Almond Essence
1oz Ground Almonds
3oz Cherries (Chopped)


Cooking time: 180c / Gas mark 4 for 15 minutes on a pre-heated oven
Serving: 12 Cupcakes

1. Cream together the butter and sugar for a few minutes until well combined and creamy
2. In a separate bowl whisk together the eggs and almond essence
3. Whisk the egg mixture into the butter mixture until well combined and a good consistency
4. Sieve the Flour and baking powder into the mixture
5. Chop the cherries and then coat them in the ground almonds and put this into the mixture
6. Fold in gently the flour and cherry mixture into the butter mixture
7. It should form a nice smooth dropping consistency
8. Divide the mixture between the cupcake cases and pop in the oven for 15 minutes or until risen and golden
9. Remove and leave in the tin for 10 minutes to cool before transferring to a wire cooling rack

Amaretto Syrup
1Tsp Almond Essence
70oz Caster Sugar
70ml Water

1. Combine the ingredients in a jug
2. Put this in the microwave and heat until the sugar has dissolved and it forms a syrup
3. Pour the syrup on to each of the cupcakes and leave to cool

Almond Buttercream and Decoration
40z butter
12oz Icing Sugar
1Tsp Almond Essence
Ground Almonds
Flaked Almonds
Cherries

1. Put the butter into a bowl along with the sieved icing sugar
2. Whisk this mixture together for a good few minutes
3. Add the almond essence (this may very depending how strong you like it)
4. Whisk until it is combined, be careful not to over whisk otherwise it will make it difficult to pipe
5. Put the icing into a pipping bag / knozzle and pipe onto the cupcakes in a swirl
6. Place 4 flaked almonds upright at the peak of the icing and a quarter of a cherry in the middle
7. Sieve some ground almonds on top and you are done!

Monday, 25 October 2010

Cherry and Coconut Cake with Coconut Buttercream


6oz Butter
6oz Caster Sugar
6oz Self Raising Flour
1Tsp Baking Powder
1Tsp Almond Essence
4oz Cherries (Chopped)
2oz Dessicated Coconut
3 Eggs
1Tbs M ilk

Cooking time: Gas Mark 4 / 180 Fan

Serving: 2 x 7 inch cake tin to make a double layer sponge

1. Cream together the butter and sugar for several minutes until well combined and creamy
2. In a separate bowl whisk the eggs and almond essense until well beaten, approx. 2-3 minutes
3. Whisk the eggs slowly into the creamed butter mixture until well combined and it forms a nice pale, creamy mixture
4. Sieve the flour and baking powder into the creamed mixture and fold in gently
5. Cut the cherries into half and coat in the coconut (This prevents them from sinking)
6. Fold the cherries and coconut into the mixture along with the milk so that the mixture is a nice dropping consistency
7. Divide the mixture evenly between the two tins and spread out with a knife and then pop in the oven and bake for the prescribed time or until golden
8. Remove the tins from the oven and leave the sponge in the cake for 5minutes to cool before removing and transferring to a cooling rack

Buttercream Icing
I used the 'perfect buttercream icing' on this website and then added 3oz Desnicated Coconut and 1Tbs of Milk and whisked for several minutes until nice and creamy and light.

Then Divide the icing, leaving slightly more for the middle of the cake, I also put blackberry jam in the middle to give it that extra kick and sprinkled flake on top. You can never have too much in or on a cake.

Then eat and enjoy!

Saturday, 23 October 2010

Quick Chocolate Chip Cupcakes


6oz Butter
6oz Caster Sugar
6oz Self Raising Flour
1Tsp Baking Powder
3 Eggs
1Tbsp Vanilla Essence
100g Packet of Chocolate Chips

Cooking time: 12 minutes on 180 Fan / Gar Mark 5 in preheated oven
Serving: 18 cupcakes

1. Pre heat the oven and get 2 cupcake trays out and place cupcake cases in them
2.Cream together the butter and sugar in a bowl with a whisk for a few minutes
3. In another bowl whisk the eggs until beaten with the vanilla essence
4. Whisk the eggs into the creamed mixture until it is well combined
5. Sieve in the flour and baking powder and fold in gently
6. Divide the mixture evenly between the cupcake cases
7. Sprinkle chocolate chips on each cupcake (Be generous)
8. Place in the oven and bake for 12 minutes or until golden
9. Leave in the baking tray to cool for approx 10 minutes before transferring to a wire cooling rack.

Icing
200g Bar of Dark Chocolate
50g Icing Sugar
Chocolate Buttons

1. Place a heat proof bowl over a saucepan of boiling water on a low heat
2. Add the chocolate to the bowl and melt slowly, stirring occasionally to ensure it does not burn
3. Once melted, sieve the icing sugar into the chocolate mixture and mix
4. Keep over the boiling water and mixing to help the mixture become a smooth consistency but still thick
5. Divide the mixture between the cupcakes, putting approx. Tsp of melted chocolate on each cupcake and make a little swirl
6. Add a chocolate button on top and then enjoy!

N.B. This recipe is great if you are short of time!.
N.B.You can use any kind of chocolate chips for this mixture.
N.B. If you prefer milk or white for decoration you can use this instead or even do a mixture!

Sunday, 10 October 2010

Birthday Cakes


Here are a few Birthday Cake designs that my family love!
Both of these cakes we used the chocolate chip cake mixture found on this website!

For the 80th birthday cake we used;
A packet of Fondant icing
1/2 a batch of the Perfect Buttercream Icing but with a few drops of green food colouring mixed into it
Strawberry Jam

1. Roll out the fondant icing so that it just under a cm thick
2. Lay out a plate on top of the icing and cut around it and then roll out the icing again and cut out strips the height of the cake and the length the circumference of the cake
3. Put a smooth layer of the jam over the cake (This helps hold the icing in place)
4. Lay the circle shaped icing on top of the cake and the strip around the cake making sure it joins at the top
5. Put the buttercream icing in a piping bag and using a flower knozzle, pipe a decoration onto the cake
6. We did it near the top so it helps hide the join between the top and bottom of the fondant rolled icing
7. With the icing that is left over, we rolled it out then using a cookie cutter cut star shapes to go around the cake to add some even more glam.

For the 21st Birthday cake we used;
A batch of the Perfect butter cream icing with a tint of green food colouring
2 tubes of smarties

1. With the buttercream icing do not whisk it for as long and add slightly more icing sugar, this makes the icing sugar stiffer and therefore easier to spread and make smoother on the cake, which makes it easier to decorate
2. Smooth the icing all over the cake, ensuring it is an even layer
3. With the smarties, make any design you like, as you can see we did 21
4. We then got some ribbon and put this around the cake, this just makes it a slightly higher class and looks fab.


Chocolate Button Cupcakes


6oz Self Raising Flour
6oz Granulated / Castor Sugar
6oz Butter
3 Eggs
2oz Cocoa Powder

Cooking time: 15 Minutes on Gas Mark 5 / 180c
Serving: 15 Cupcakes

1. Fill 2 cupcake tins with cupcake cases and preheat the oven
2. Cream together the butter and sugar with a whisk until smooth
3. Whisk the eggs together for a few minutes in a separate bowl
4. Whisk the eggs into the creamed butter mixture until the mixture is well combined and forms a smooth consistency
5. Sieve the Flour and Cocoa Powder into the mixture
6. Fold this in slowly into the butter mixture as not too loose the air gained from the eggs (a figure of 8 motion with a wooden spoon I find is best)
7. Once it is all mixed together well, divide the mixture evenly between the cupcake cases
8. Put in the pre heated oven and bake for approx 15 minutes or until well risen
9. Remove and leave in the tin for 5-10 minutes before removing and placing on a wire cooling rack

Buttercream Icing
12oz Icing Sugar
4oz Butter
1 Tbsp Milk
2oz Cocoa Powder

1. Cream the butter until smooth
2. Add the icing sugar and crumble together with your fingers or a whisk until the mixture forms together
3. Now that the icing is smoother with a whisk, whisk together for approx 5 minutes until the mixture becomes nice and light and fluffy
4. Add the cocoa powder and milk and whisk for a further 3-5 minutes until it is well combined and light
5. Spoon a dollop of icing onto each cupcake and with a wet knife smooth out the icing making a little peak in the middle
6. Top each cupcake with a chocolate button and enjoy!

Sunday, 3 October 2010

Perfect Buttercream Icing for a double layer cake!


14oz Icing Sugar
5oz Butter


1. Sieve the Icing Sugar into a bowl
2. Add the butter and with a fork or your finger, crumble it together so the mixture begins to form together
3. Whisk the icing sugar and butter together for approx 5 minutes, this will then make it nice and fluffy - amazing!
N.B. Add any flavour you like to this; 2oz cocoa powder / 2 Tsp of any Essence / or Juice of half a lemon / orange.
N.B. You can also pipe this on to cupcakes or you can freeze it in the freezer for up to 3 months or leave in the fridge and just have a sneeky eat now and then!

Chocolate Mint Aero Cupcakes


4oz Butter
4oz Granulated Sugar
4oz Self Raising Flour
1Tsp Baking Powder
2 Eggs
3oz Aero Mint Chocolate Bar (Chopped)
1 and 1/2Tsp Peppermint Essence
Cooking time: 180c / Gas Mark 5 for approx 15 minutes
Serving: 12 Cupcakes


1. Cream together the butter and sugar in a bowl until smooth
2. Whisk the eggs separatly in a bowl until combined
3. Whisk the eggs and peppermint essence into the butter mixture until well combined and smooth
4. Coat the aero mint chocolate in the flour
5. Sieve the flour and baking powder into the creamed mixture
6. Gently fold the flour mixture into the mixture followed by the chocolate
7. Be careful not to fold too much as the mixture will loose its air and not rise
8. Divide the mixture between the cupcake cases and bake in the oven for 15 minutes or until golden
9. Remove from the oven and leave in the tray for 10 minutes to cool before transferring to a wire cooling rack

Icing
12oz Icing Sugar
4oz Butter
2Tsp Peppermint Essence
A Few drops of green food colouring
1Tbs of Milk
Aero Mint Chocolate Bar

1. Sieve the icing sugar into a bowl
2. Add the butter to the icing sugar and with a whisk, whick the mixture until it is well combined and smooth, keep whisking to make it lightly, this should be for approx 3-5 minutes
3. Add the peppermint essence, food colouring and milk and whisk for another 1-2 minutes
4. The mixture should now be ready, once ready fill a pipping bag or tube with the icing and I placed a swirl knozzle on the end to pipe on to the cakes
5. Lastly break the left over aero mint chocolate bar on top of the icing and you are finished!